Instructional Machine Setup
This page contains instructions for connecting to the instructional machines, which may be useful for Project 1.
SSH Information
There’s nothing for you to do in this section, but please read through it so you understand what we’re about to do.
Project 1 can be run on the Ubuntu login servers (ashby, cedar, cory or derby). To support running the project off-campus, we’re going to use SSH, which lets you connect to the instructional machines remotely. With SSH, you can enter commands on your own computer that will be run on the instructional machines, and see the outputs from the instructional machine on your own computer.
To get an account on the instructional machines, you will create an account on the EECS website. This will give you a username and password, which you could use to log in physically on the instructional computers.
To SSH onto the instructional machines using your username and password, you would run a command like ssh username@cory.eecs.berkeley.edu. Here, username is specific to your account, and cory.eecs.berkeley.edu is the Internet address of the instructional computer (so everyone connecting to this machine uses this address).
Since this SSH command is long, we’ll add a line in your SSH configuration file that lets you write something like ssh cory as a shorthand for the longer command above.
The SSH command will prompt you for a password every time you log in. To avoid having to type your password every time, we will set up key-based authentication. You’ll create a key on your local computer. Then, you’ll copy this key over to the instructional machines. In the future, instead of asking you for a password, the SSH process will automatically use the keys on your computer and the instructional computer to authenticate you.
One last thing we need to consider is Berkeley’s network policy, which by default disallows SSH connections from non-Berkeley networks. During setup, you will need to join a Berkeley network. In the SSH configuration file, we will add a line to allow connections from non-Berkeley networks. After you’ve finished setup, you should be able to SSH from any network.
Note that Project 1 on the instructional machines runs on a virtual machine (VM), which is an operating system running on the instructional machine. Once you’re on the instructional machines, you’ll need to SSH from the instructional machines into the VM. This means that you’ll actually be running two layers of SSH: one layer from your local computer to the instructional machine, then another layer from the instructional machine into the project VM.
Creating an Instructional Account
- Visit the EECS web account page.
- Click “Login using your Berkeley CalNet ID”.
- Find the
cs161row, and click “Get a new account”. - Write down the account login (cs161-xxx, where xxx is 3 letters unique to you), and the password. You will need them later.
Connect to a Berkeley Network
You have to connect to the Secure VPN for all SSH connection, even if you are on eduroam.
Instructions for Installing the Berkeley VPN: Install the Berkeley VPN.
-
Download and install the VPN software. Windows and Mac users: https://vpn.berkeley.edu/global-protect/getsoftwarepage.esp
Alternate, open-source version for Linux users: https://github.com/yuezk/GlobalProtect-openconnect
-
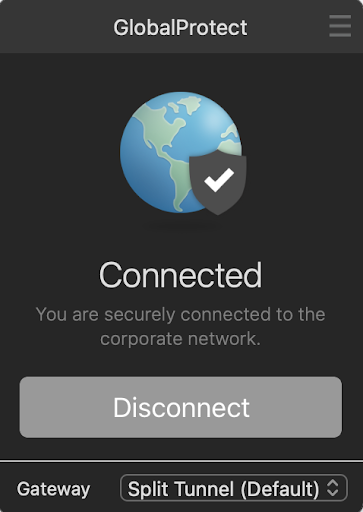
Open the newly installed “GlobalProtect” app and enter
vpn.berkeley.eduas the portal address. You will be prompted to log into CalNet, and then you will be connected to the VPN.
SSH Key Setup
All steps in this section should be performed on your local computer. For this section, do not SSH into any remote machine.
All steps in this section should be performed while connected to the Berkeley network (either on eduroam, or with the VPN connected).
- Open a terminal. Don’t use a terminal built into a text editor like VSCode. On Windows machines, we recommend Git Bash.
-
Run the following command in your terminal:
curl -s https://assets.cs161.org/proj1/get-ssh-key.sh | bashIf it worked, you should see “Success!” displayed in the terminal.
- Run the following command in your terminal:
ssh-copy-id cs161-xxx@cory.eecs.berkeley.eduReplace the instance of
xxxwith the three-letter account login you obtained when you created an instructional account.If you’re getting “Connection refused” or “Connection timeout” or other connection errors, try using one of the other 3 servers (ashby, cedar, or derby).
If it is unavailable, you may also use the eecs system status page to check the status and workload of the “Soda Servers”.
Make sure you are not connected to any other VPNs (if you’re currently on Eduroam). If you see a prompt like “Are you sure you want to continue connecting”, you can type
yes. If it worked, you should see a password prompt, likecs161-xxx@cory.eecs.berkeley.edu's password: -
In the password prompt, type in the account password you obtained when you created an instructional account. You will not see the password appear in the terminal as you type it; this is intended.
If it worked, you should see “Number of key(s) added: 1” (the number should not be zero).
SSH Configuration Setup
All steps in this section should be performed on your local computer. For this section, do not SSH into any remote machine.
All steps in this section should be performed while connected to the Berkeley network (either on eduroam, or with the VPN connected).
-
Create a
~/.sshfolder by running this command in your local terminal:mkdir -p ~/.ssh -
Open
~/.ssh/configin Vim (terminal-based text editor) by running this command in your local terminal:vim ~/.ssh/config - In Vim, press the
ikey to enter insert mode.-- INSERT --should appear at the bottom left. -
Remove any SSH configurations from previous Berkeley CS classes.
These lines are from CS 61B. If you don’t need them anymore, use the arrow keys and backspace to delete them.
Host *.cs.berkeley.edu *.eecs.berkeley.edu
IdentityFile ~/.ssh/cs61b_id_rsa
These lines are from CS 61C. If you don’t need them anymore, use the arrow keys and backspace to delete them.
# Begin CS61C hive machine config
...
# End CS61C hive machine config
If you need configuration for CS 61C and CS 161 simultaneously, you should keep only CS 61C’s config (don’t add CS 161’s config). When SSHing, you’ll need to explicitly type the usernames:
ssh cs61c-xxx@coryorssh cs161-xxx@ashby.If there are config lines from another class that you still need, reach out to CS161 course staff.
-
Copy the following text into the file:
# Begin CS161 instructional machine config

Host ashby cedar cory derby
    HostName %h.eecs.berkeley.edu
Match Host *.cs.berkeley.edu,*.eecs.berkeley.edu
    Port 22
    User cs161-xxx
    ServerAliveInterval 60

# End CS161 instructional machine config
Replace instances of
xxxwith the three-letter account login you obtained when you created an instructional account. - Exit insert mode by pressing
Esc.-- INSERT --should be gone. - Save the file by typing
:w, thenEnter. - Quit Vim by typing
:q, thenEnter.
Connecting to the Instructional Machine
All of the above setup steps should only need to be done once, at the start of the semester.
There are four servers you can use: ashby, cedar, cory, and derby. To run them, simply use the following:
ssh cory
If you see a prompt like “Are you sure you want to continue connecting”, you can type yes.
This command should start an SSH session, even if you’re not connected to a Berkeley network (e.g. not on eduroam and not connected to the VPN).
If it worked, you should see some output scroll by, followed by a terminal prompt:
cory [1] ~ #
At this point, any commands you type into this terminal will be executed by the remote instructional machine on campus.
To log out of the SSH session and return to your local computer terminal, type exit.
Troubleshooting:
- If you’re getting “Connection refused” or “Connection timeout” or other connection errors, try using a different instructional machine instead.
- If you’re getting “Connection timeout” or other connection errors, make sure you are connected to the berkeley VPN. You must be connected regardless, even if you are already on eduroam.
- If your ssh setup script is not working (for example you are getting a “Permission Denied” error), you can still access the instructional machines by using the command
ssh cs161-XXX@cory.eecs.berkeley.edu, replacingXXXand using your instructional account password.